
Unit · Video walkthrough
Unit: access, shared devices, and your active crew
Sign in as an accountable person, select the correct apparatus, organize its crew, and understand shared-session and security controls.
Before you begin
- An authorized account with access to the intended apparatus through its station group.
- A training apparatus with configured crew seats and unit statuses, plus a fictional incident for practice.
- Your department’s sign-in and shared-device handoff policy. Optional SSO and verification methods depend on the department’s configuration and device support.
Chapters
- Understand the person and the apparatus
- Complete first launch and choose the server
- Sign in with an available method
- Configure a shared installation deliberately
- Verify the shared-installation sign-in boundary
- Select the apparatus you actually have
- Review the actual crew roles
- Read the unit status before changing it
- Understand the sidebar incident context
- Keep account security and recovery visible
Watch the walkthrough
Step 1
Understand the person and the apparatus
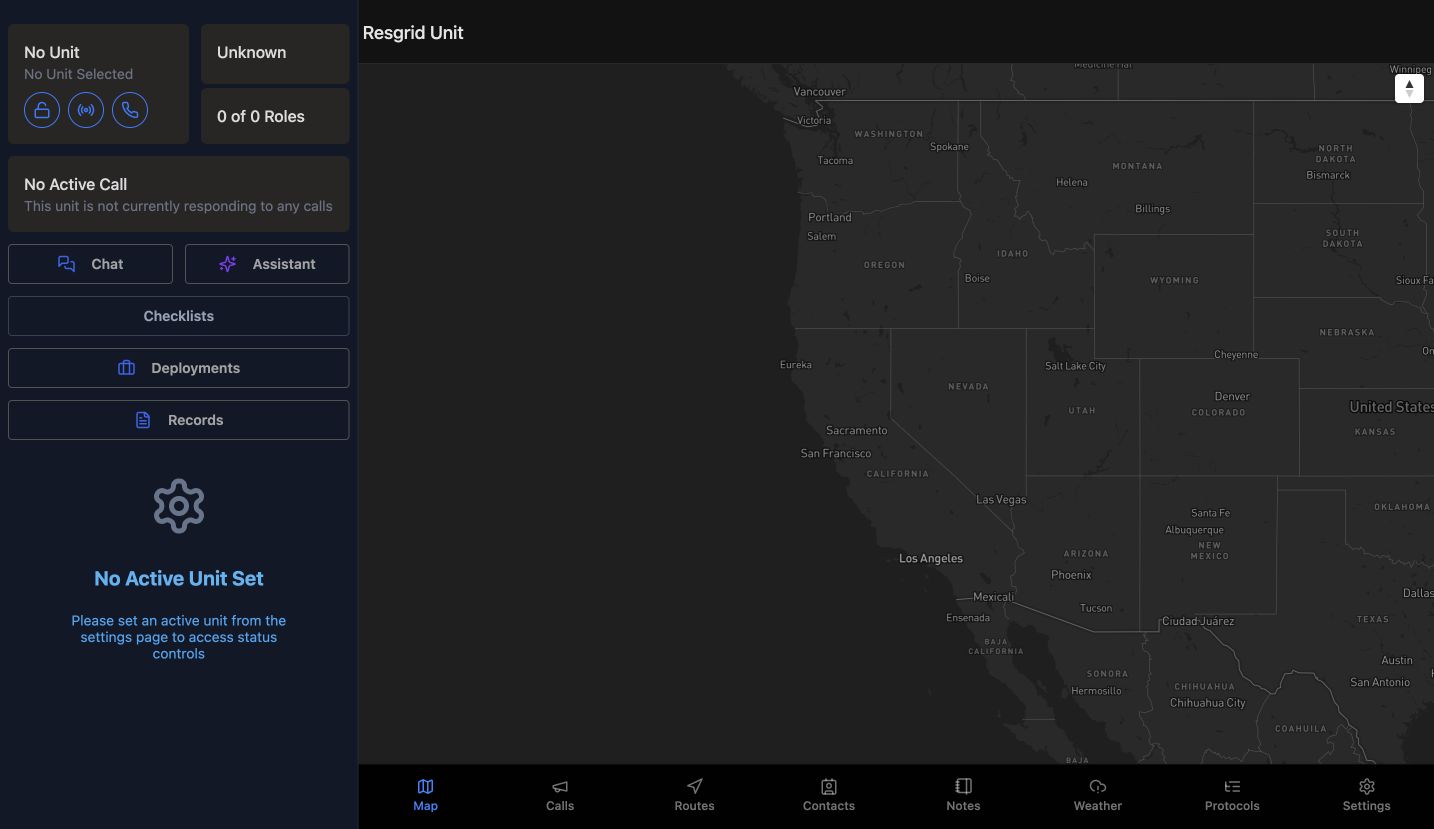
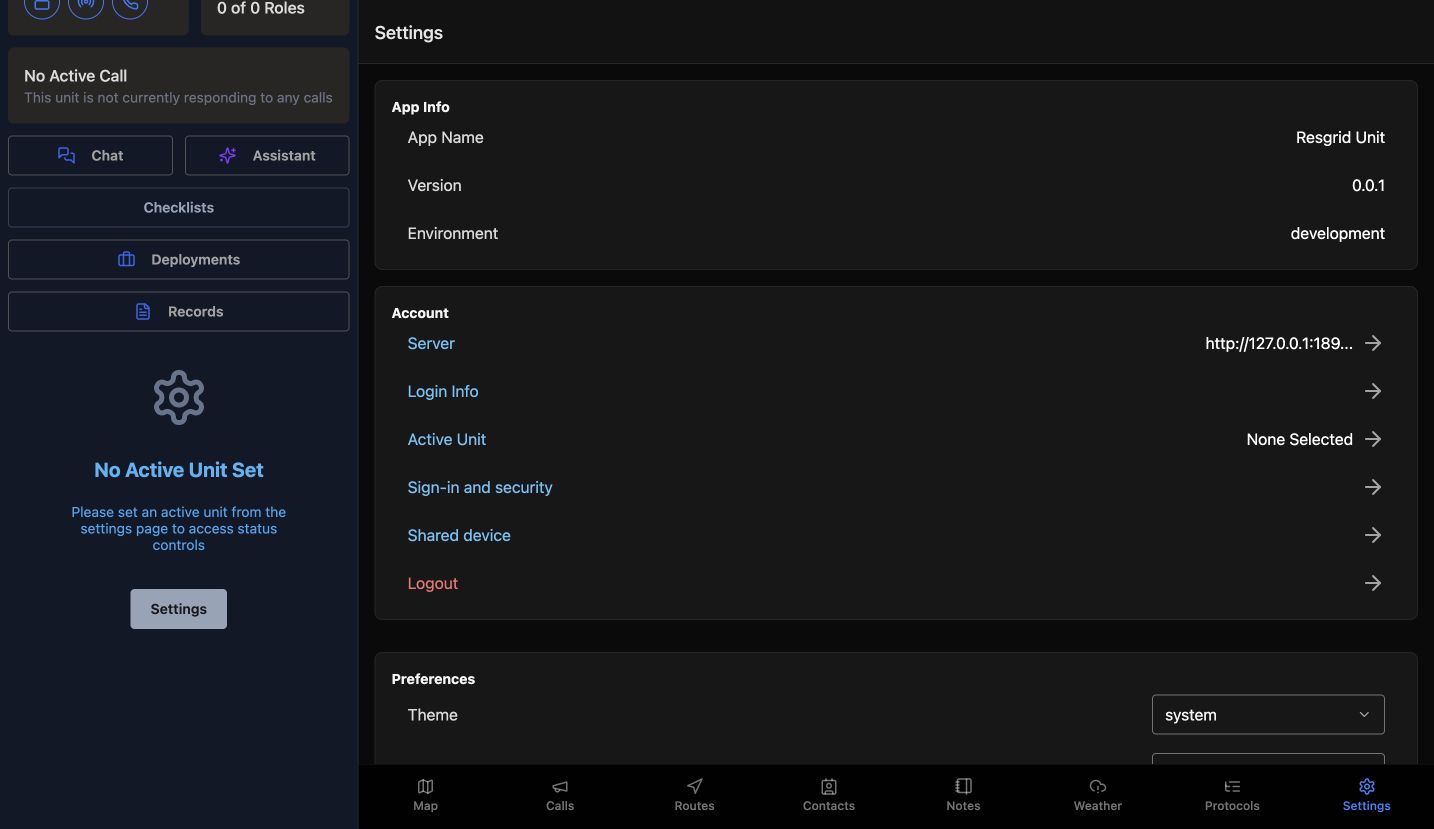
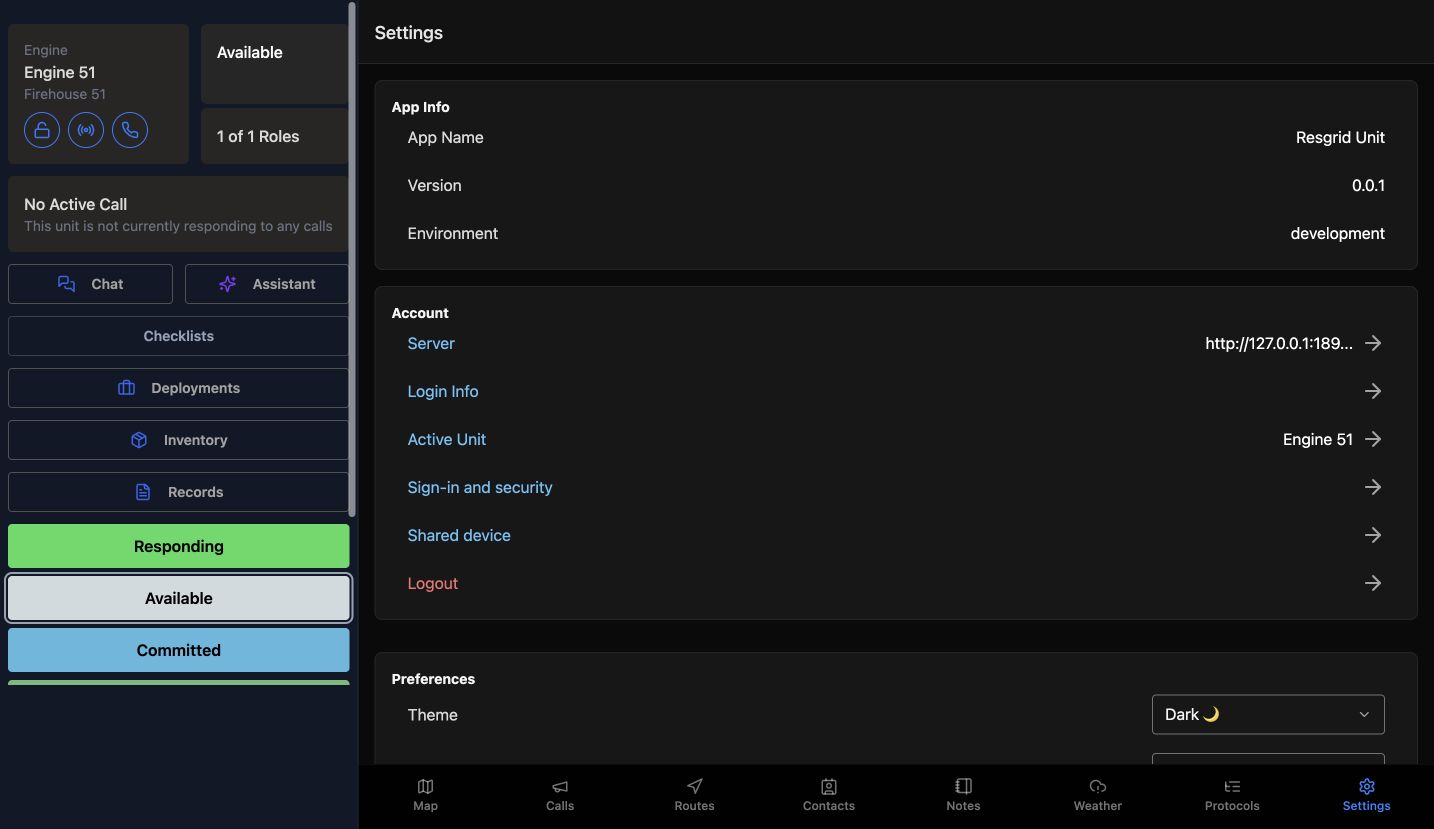
Unit follows the apparatus context selected on this device, while a named person signs in. Identify both before working. The active unit scopes status, roles, map context, routes, and inventory; review it in Settings at each handoff. This is useful for a SAR vehicle, community response team, or industrial standby. A vehicle-mounted tablet still needs the correct member and apparatus selection.
Practice
Identify the signed-in training member and the apparatus the tablet is intended to represent before changing any operational data.
Step 2
Complete first launch and choose the server
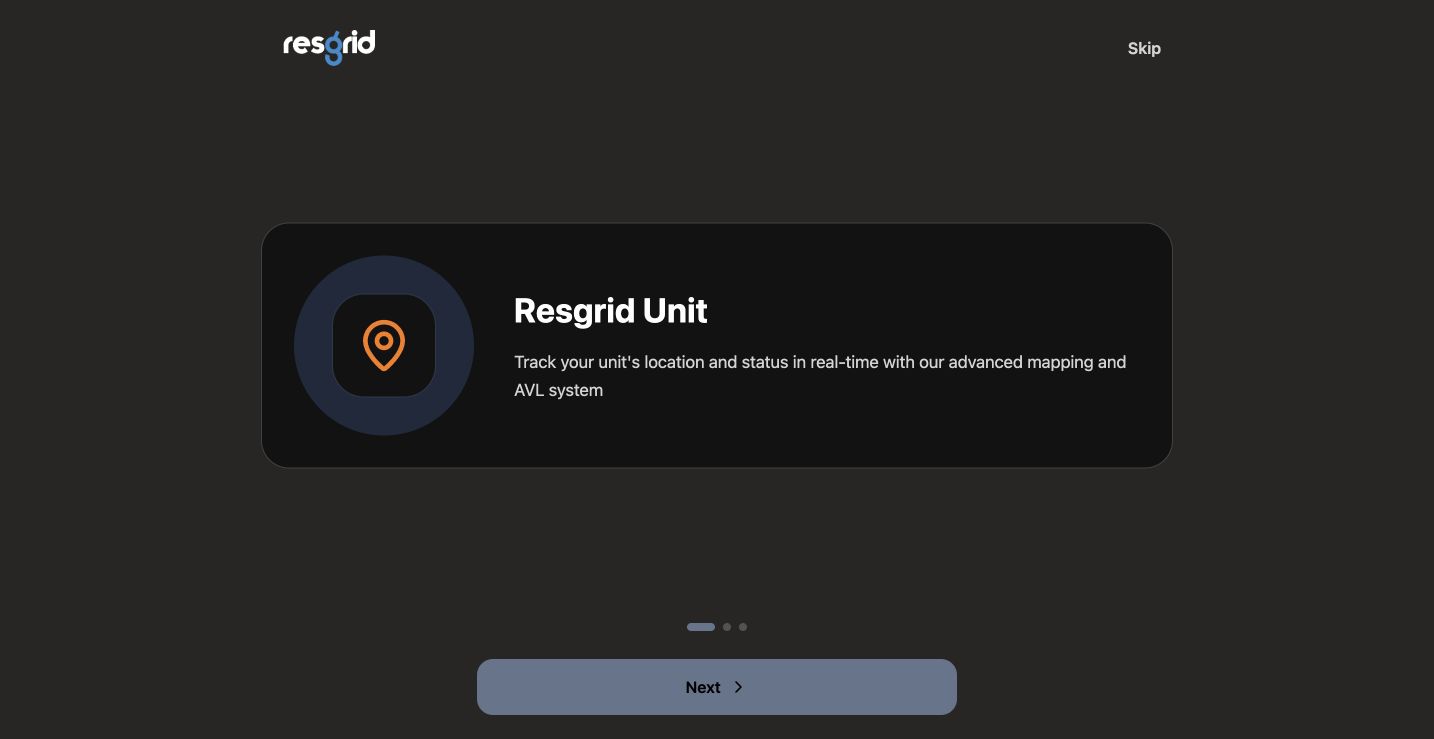
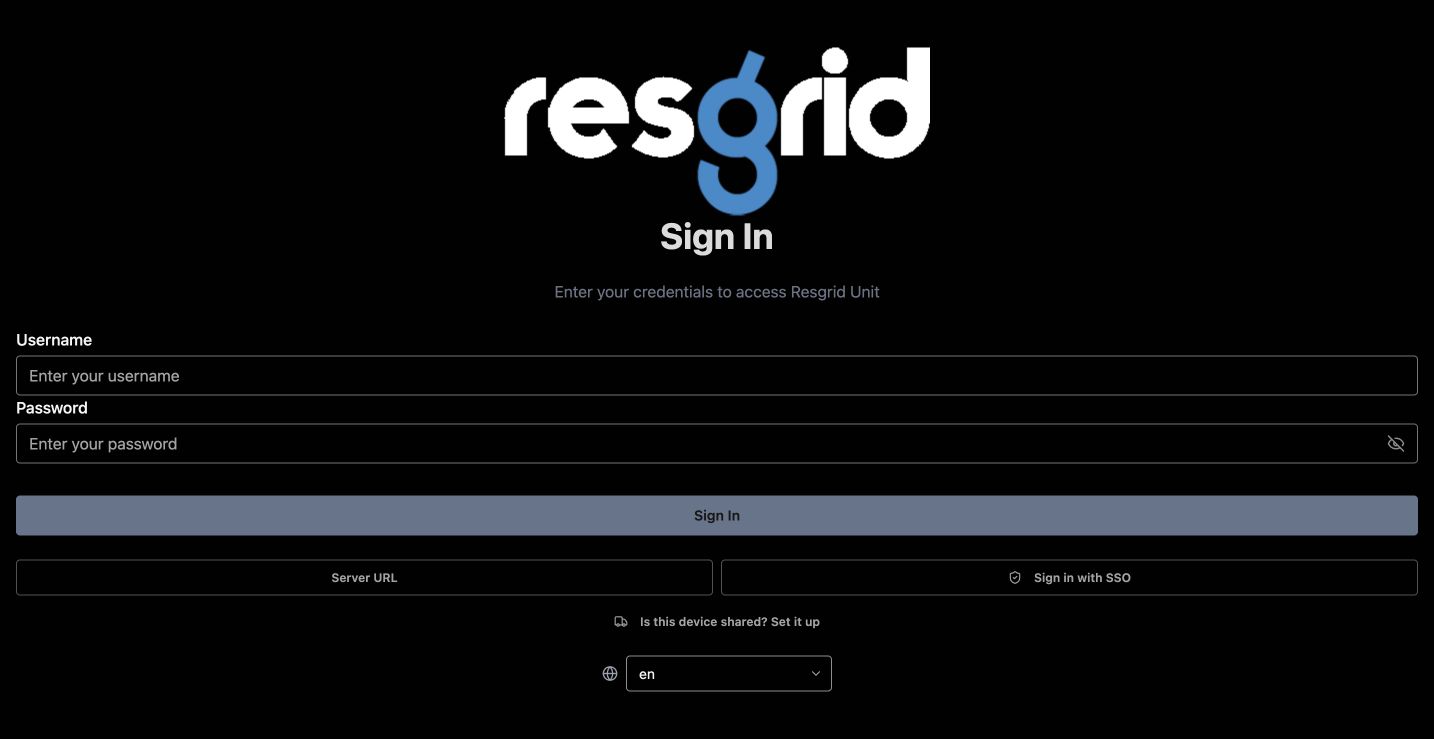
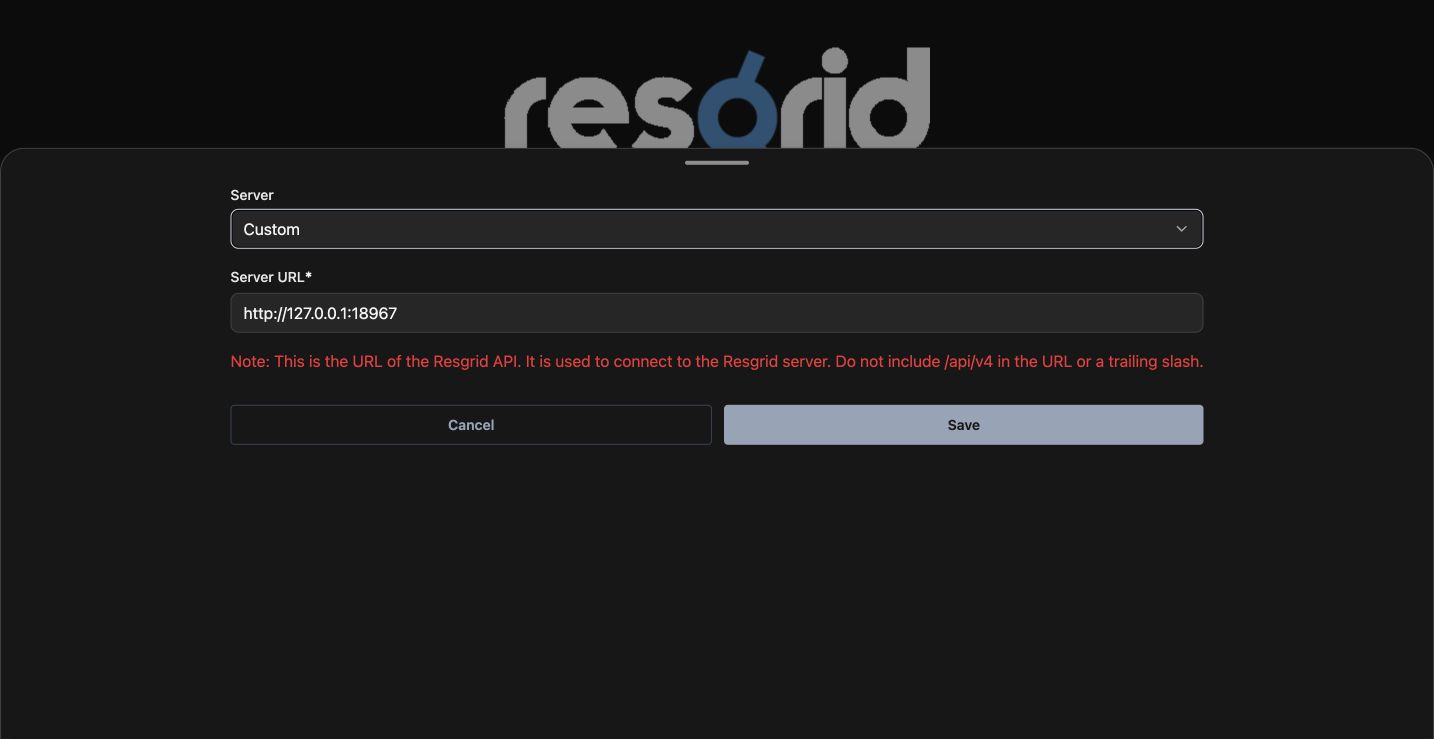
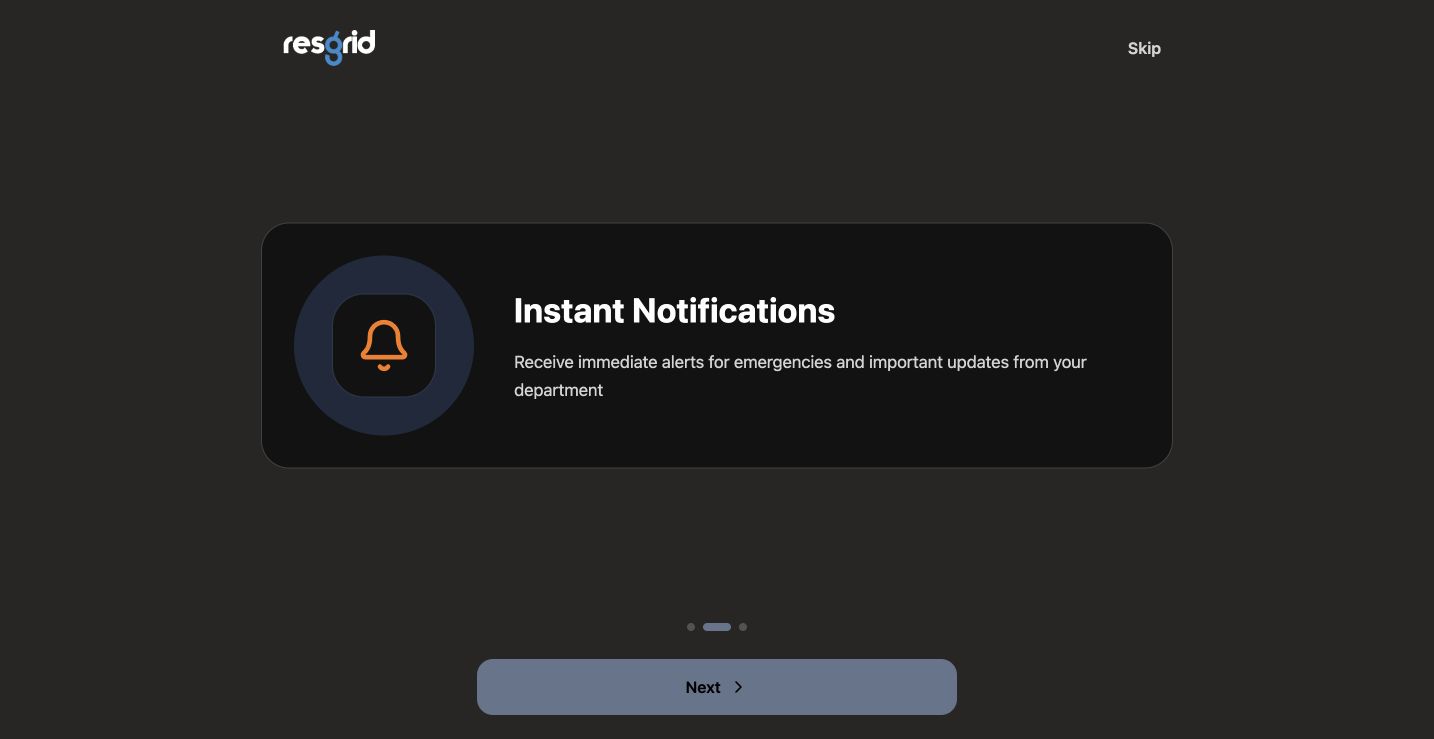
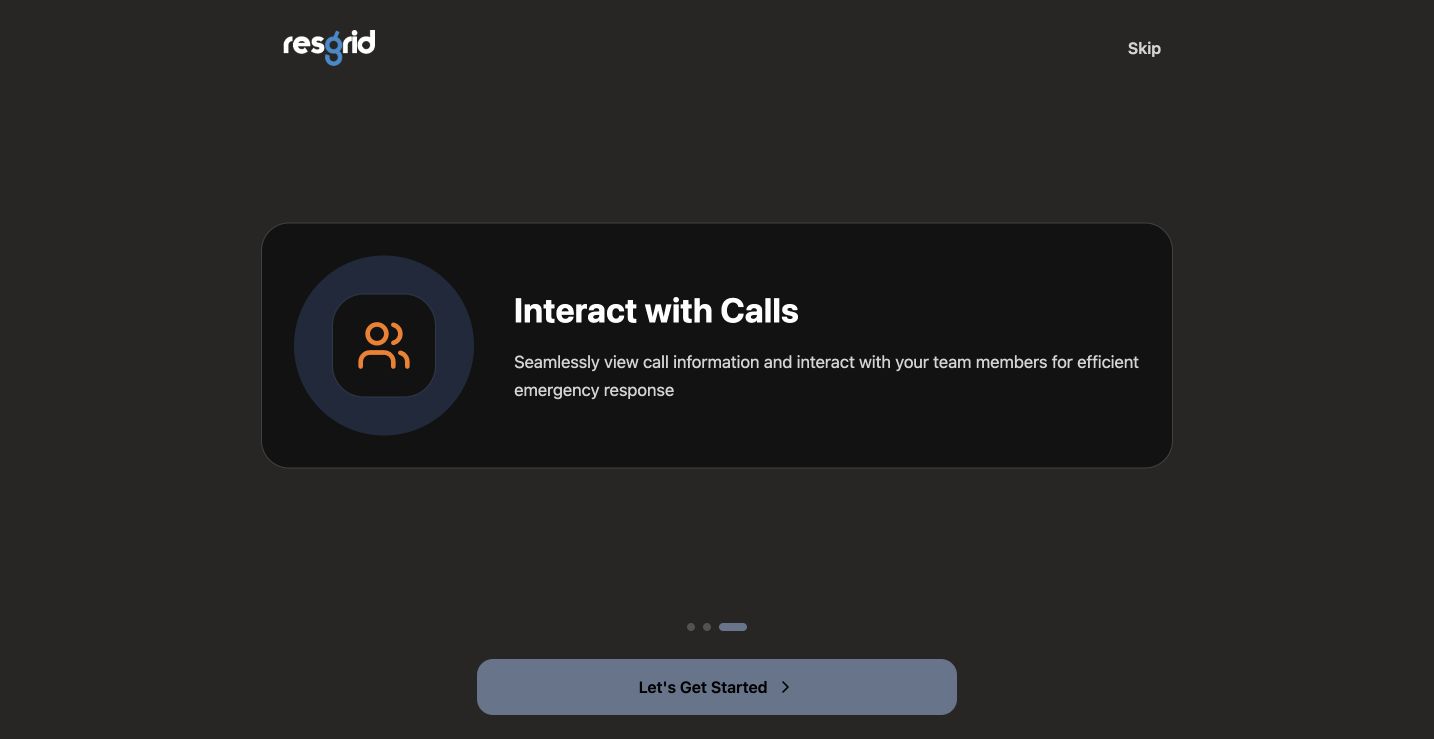
Use Next or Skip on the first-launch introduction, then review Language and Server URL on sign-in. Select the correct listed server or the permitted custom address before entering credentials. The introduction describes features but does not prove every device permission is granted. Keep the server choice visible in the demonstration so a crew can recognize a training environment and avoid confusing it with another deployment.
Practice
Confirm the correct server and language before signing in with a training account.
Step 3
Sign in with an available method
Use Username and Password and select Sign In for this training server. Sign in with SSO is an offered entry, but organization discovery and provider callbacks are unverified here. This lesson uses the ordinary credential flow. Additional verification depends on the methods the server offers; keep credential entry private and check the resulting apparatus context before working.
Practice
Use the training account’s approved sign-in method and identify the verification step actually offered to that account.
Step 4
Configure a shared installation deliberately
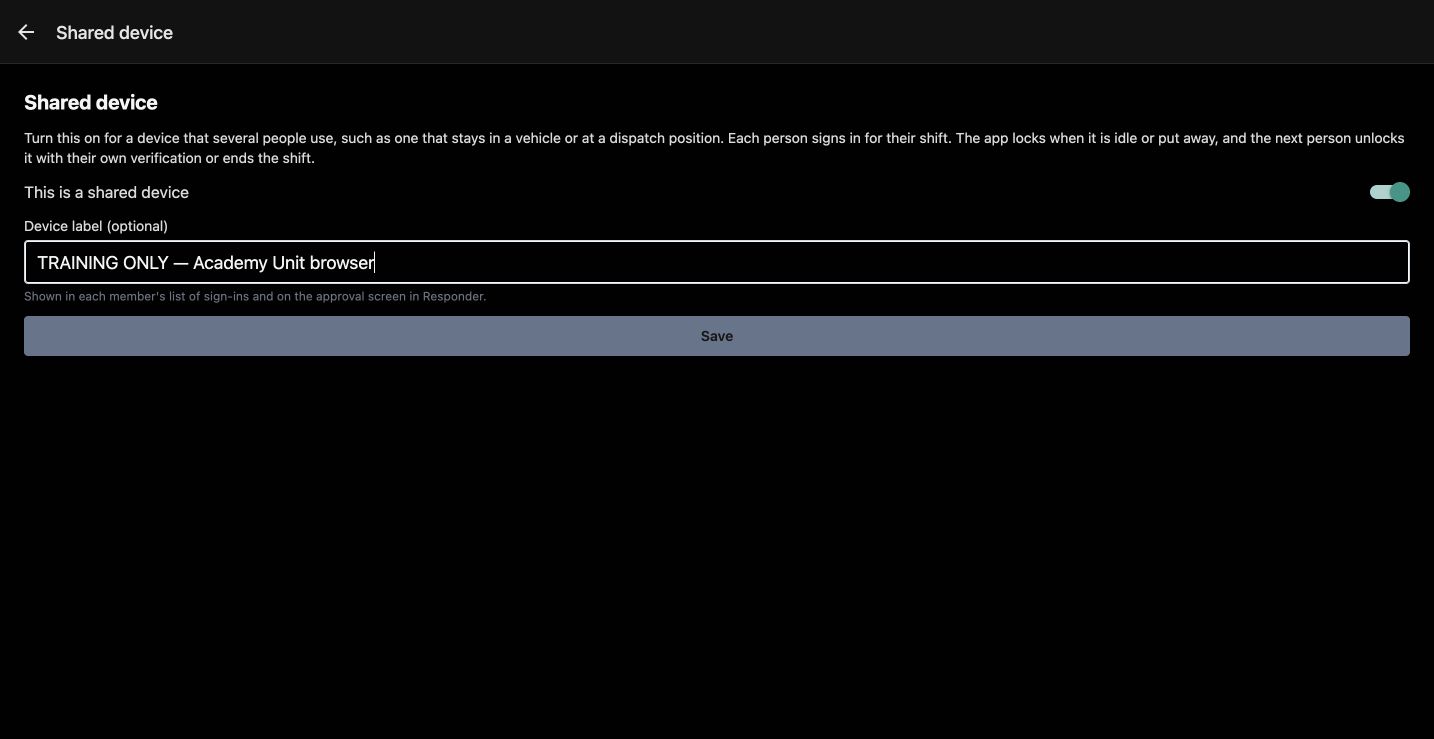
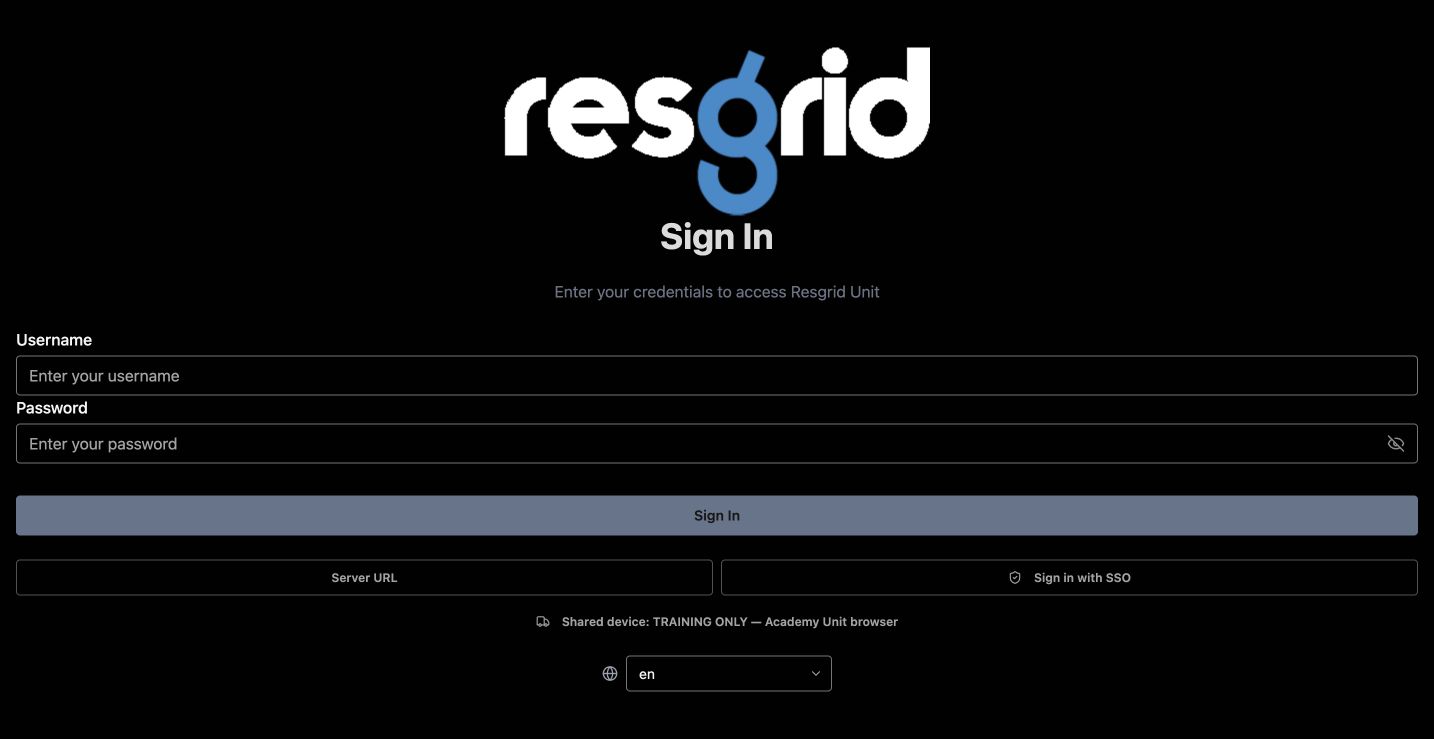
Choose Shared device when several members use the same installation. Turn on This is a shared device and enter Device label (optional), such as the training apparatus identifier, then Save. The setting takes effect at the next sign-in. It identifies the installation; it does not turn a person’s credentials into a shared crew password. Each member still follows the department’s session and verification policy.
Practice
Label a demonstration apparatus tablet and explain why the next user should sign in with their own identity.
Step 5
Verify the shared-installation sign-in boundary
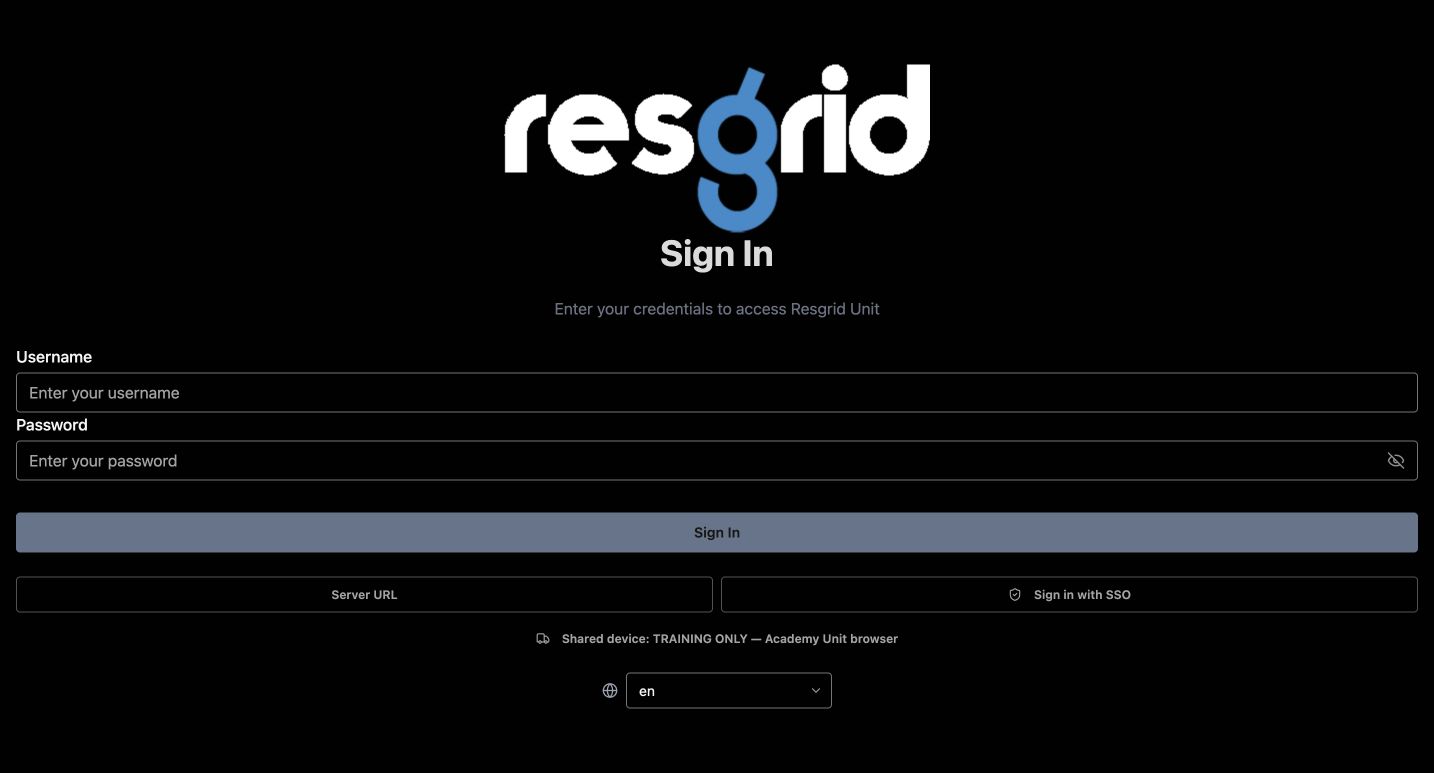
Shared device identifies the saved installation. A normal reload in this exercise returned to Sign In. Follow the server’s supported sign-in procedure at handoff, verify the member, and recheck Active Unit before work. The label and sign-in boundary are demonstrated; shared-session locking, unlocking, operator switching, and shift ending remain unverified. Those branches require server-supported controls and permitted verification methods.
Practice
Review the saved Shared device label and identify the sign-in and handoff procedure your department supports.
Step 6
Select the apparatus you actually have
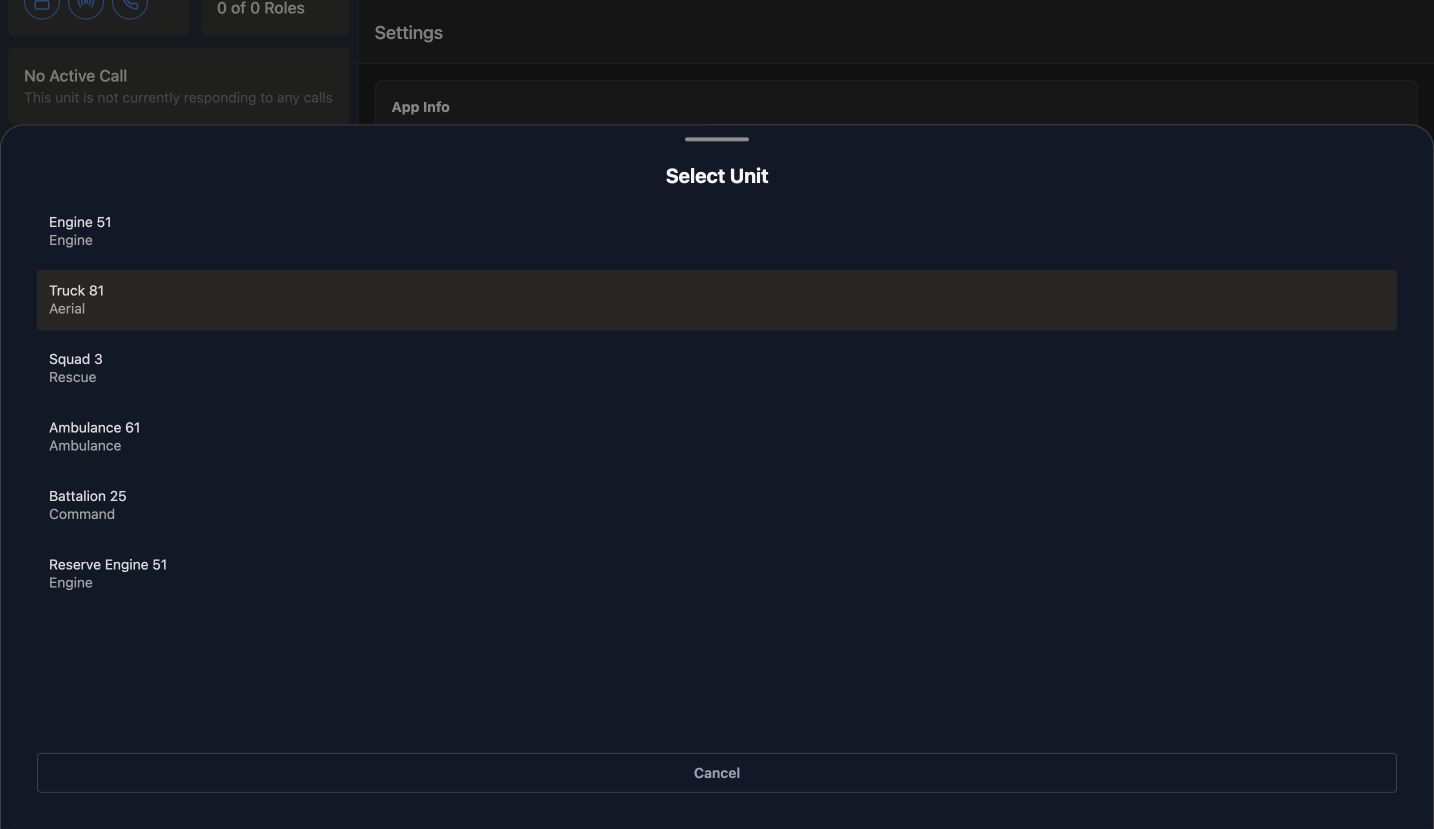
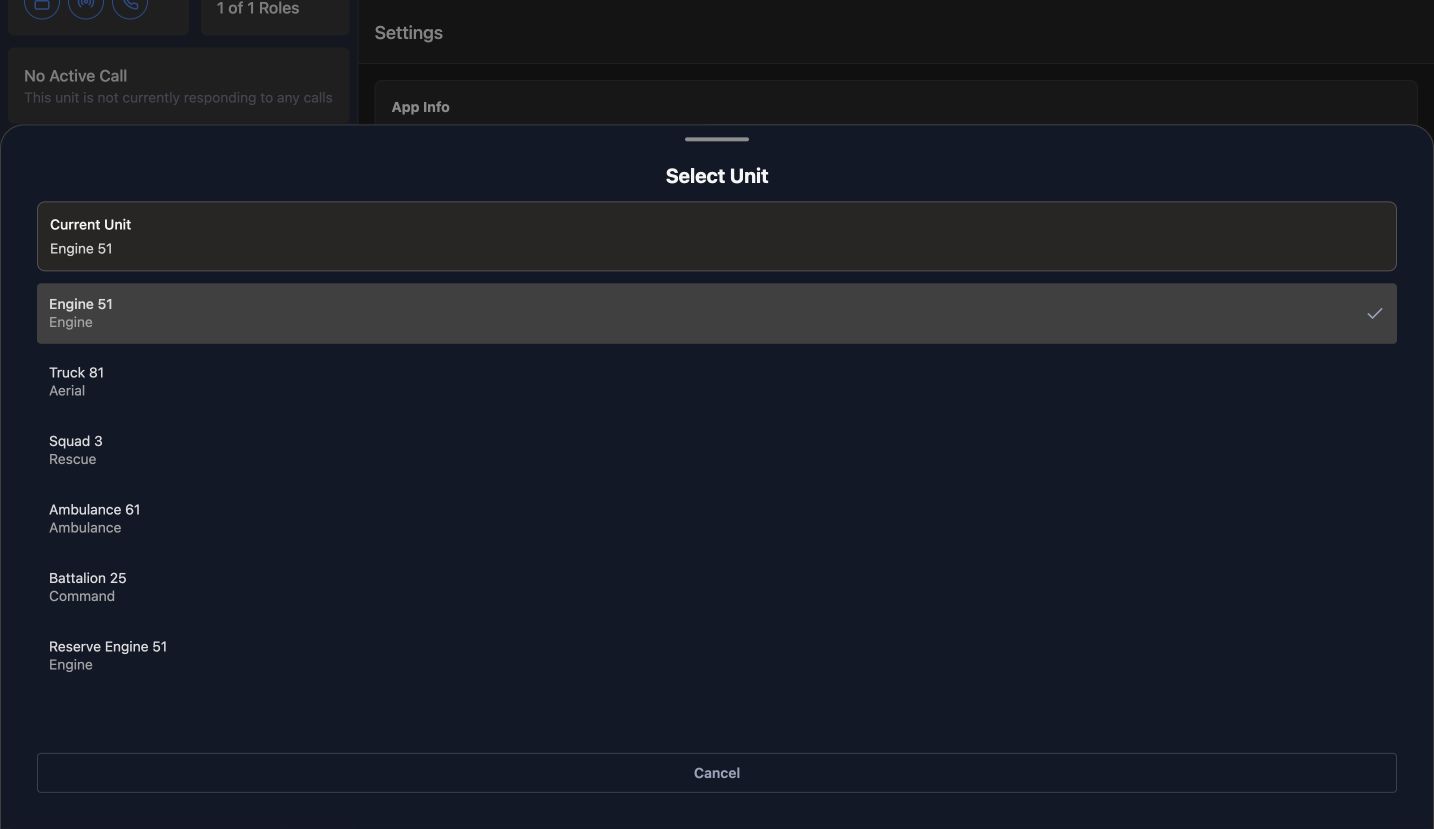
In Settings, open Active Unit and choose the apparatus for this crew. Select Unit lists the units accessible to this member, and Current Unit helps confirm the result. If the expected unit is missing, ask an administrator to check station-group membership. Do not select a different vehicle merely to clear an empty state. The selection scopes several operational screens and should be checked at every handoff.
Practice
Select the demo engine or ambulance, verify Current Unit, and explain the correct response when the intended unit is absent.
Step 7
Review the actual crew roles
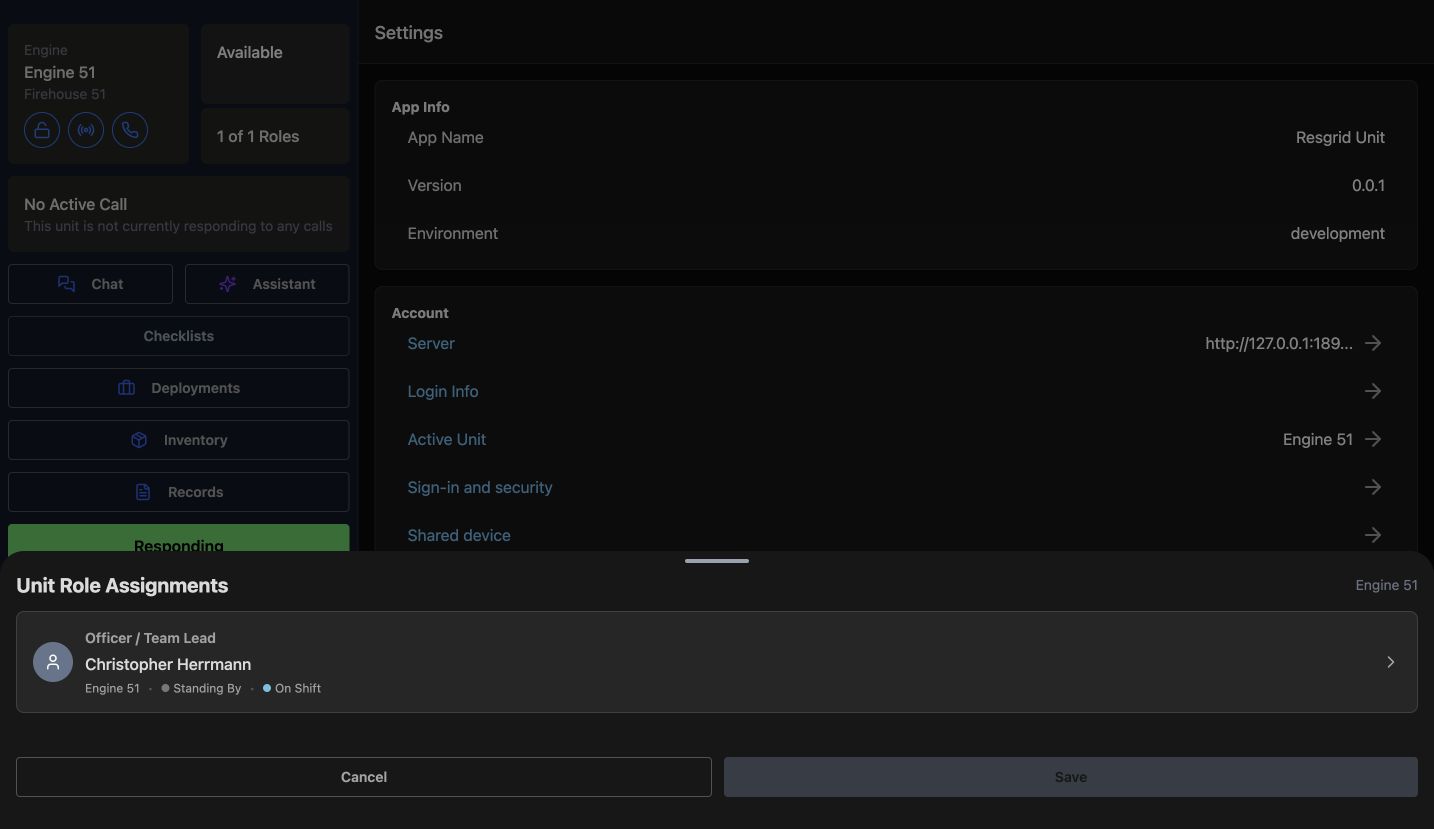
Open the roles card and inspect Unit Role Assignments. Officer / Team Lead already contains Christopher Herrmann. Save is disabled because the roster has not changed. The signed-in operator and assigned crew are separate. Review configured seats before an authorized crew change; role assignments describe apparatus functions, while account permissions and dated shift sign-ups remain separate. This exercise preserves Herrmann’s seat.
Practice
Review a configured crew seat and compare its assigned member with the person using the device. Explain why Save is disabled when the roster has not changed.
Step 8
Read the unit status before changing it
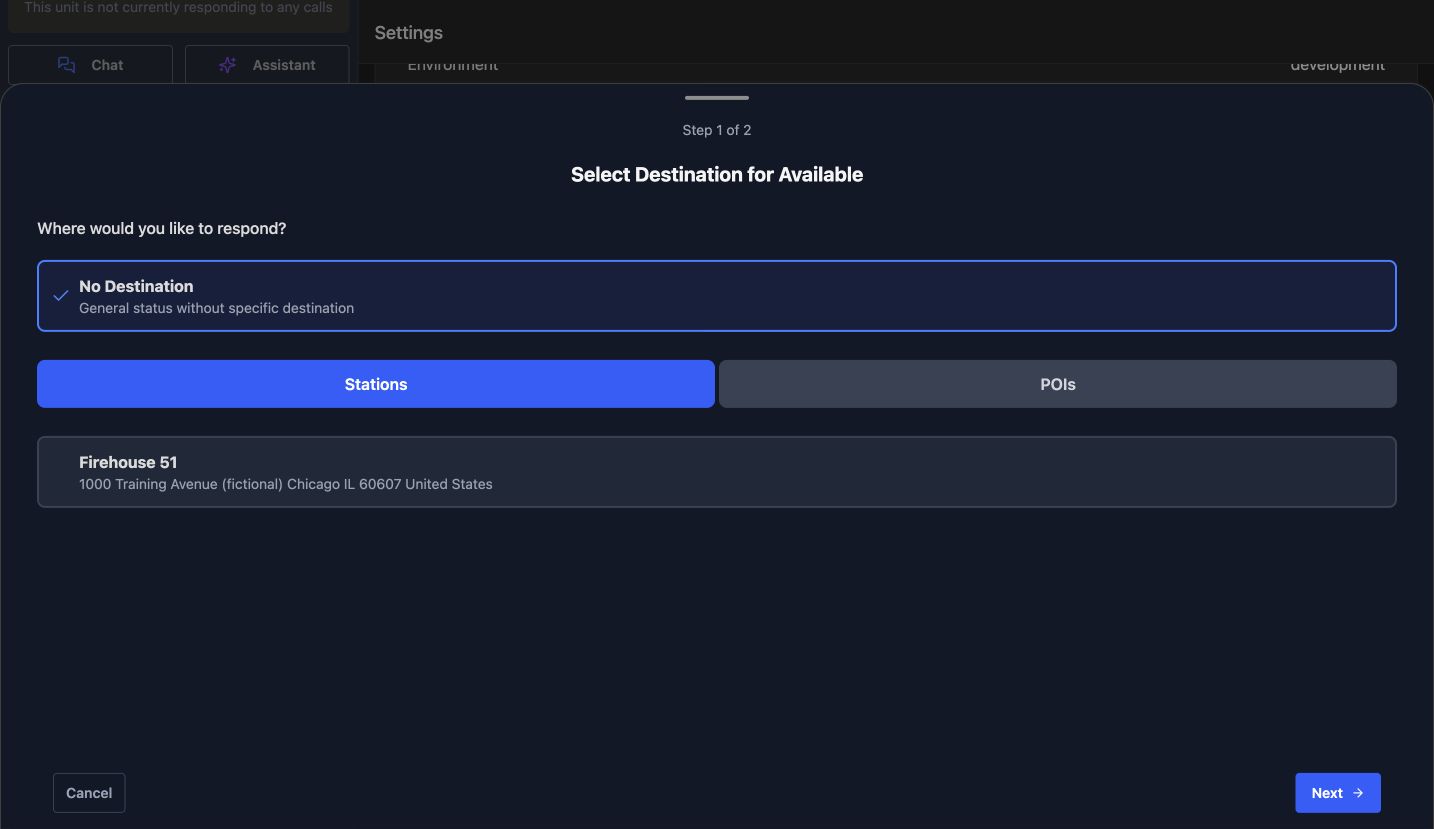
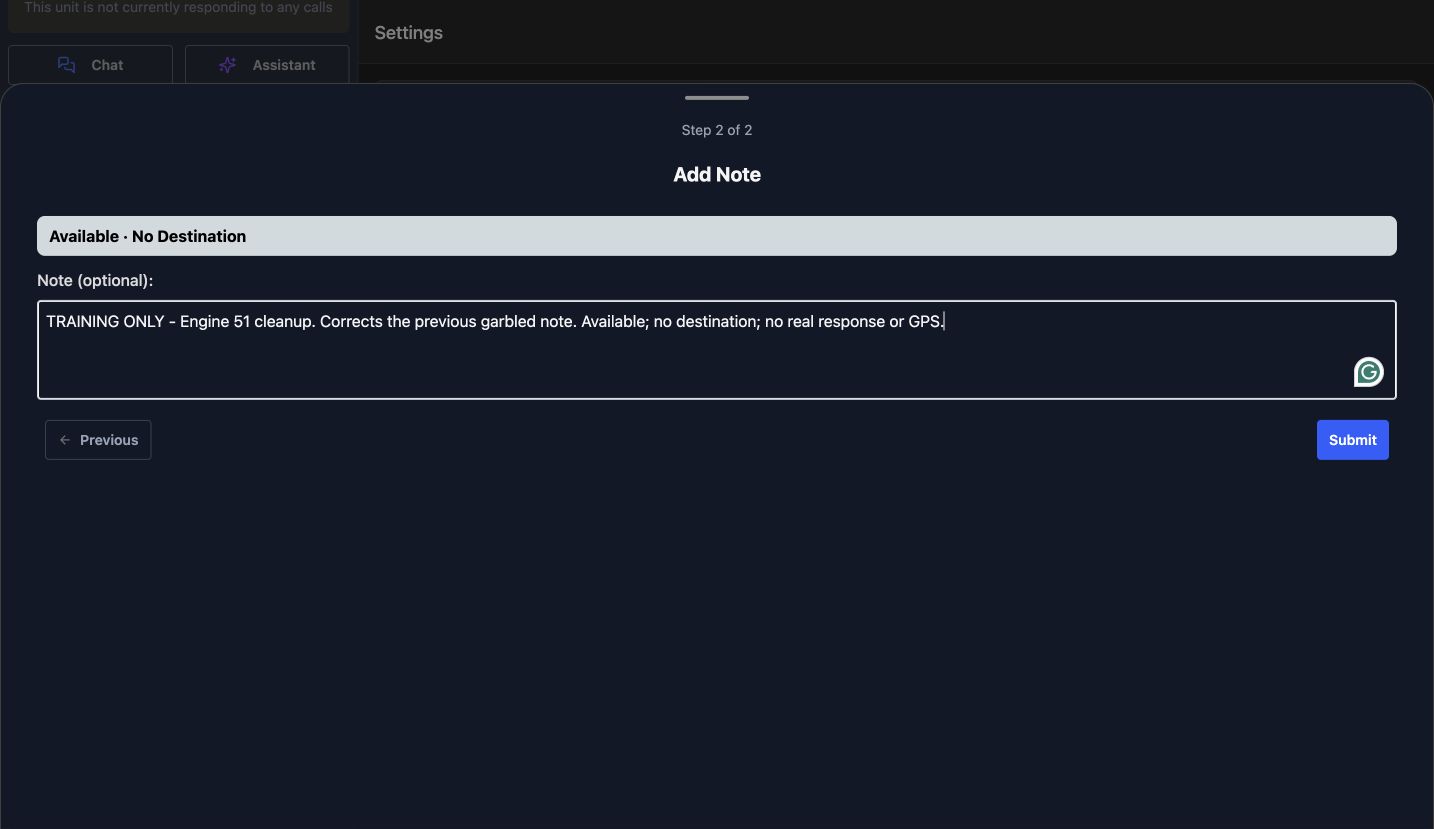
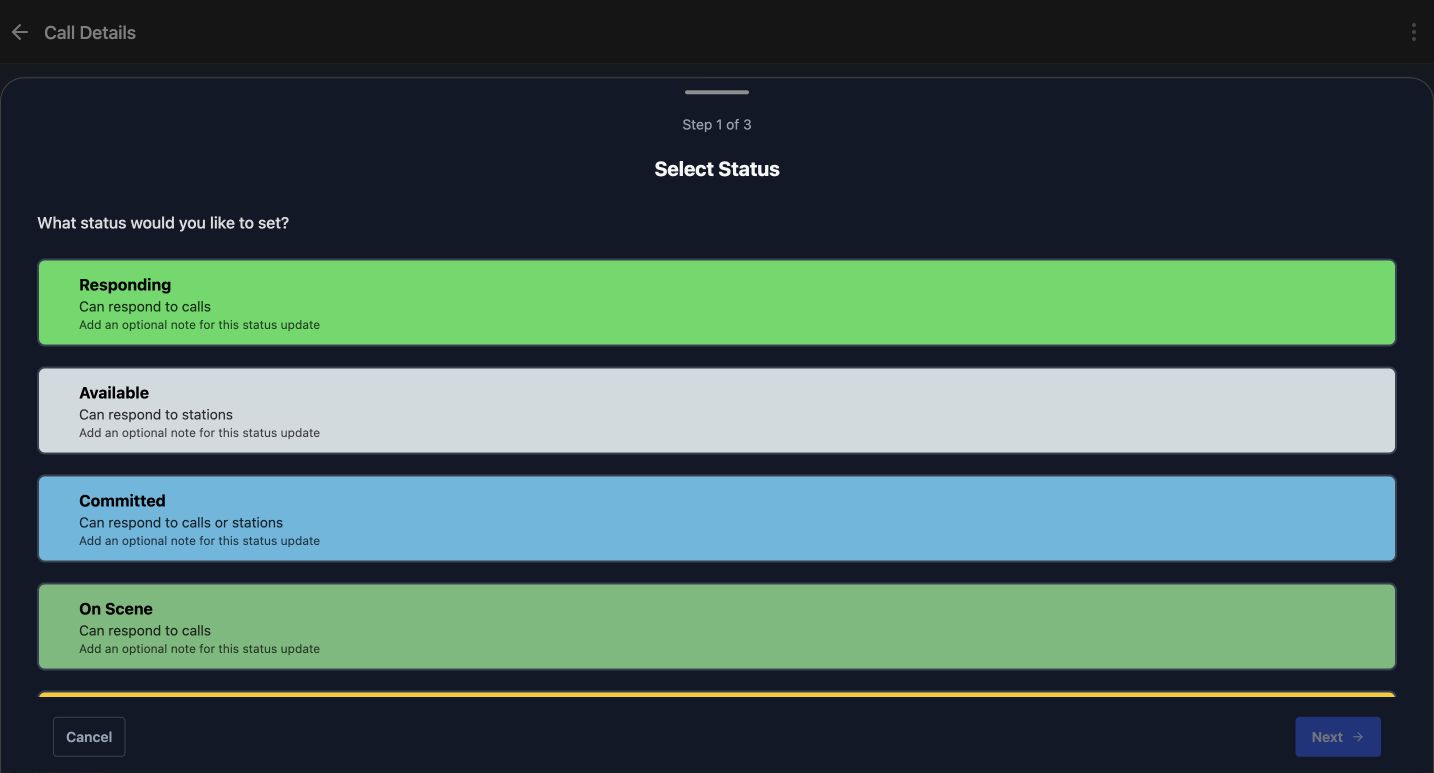
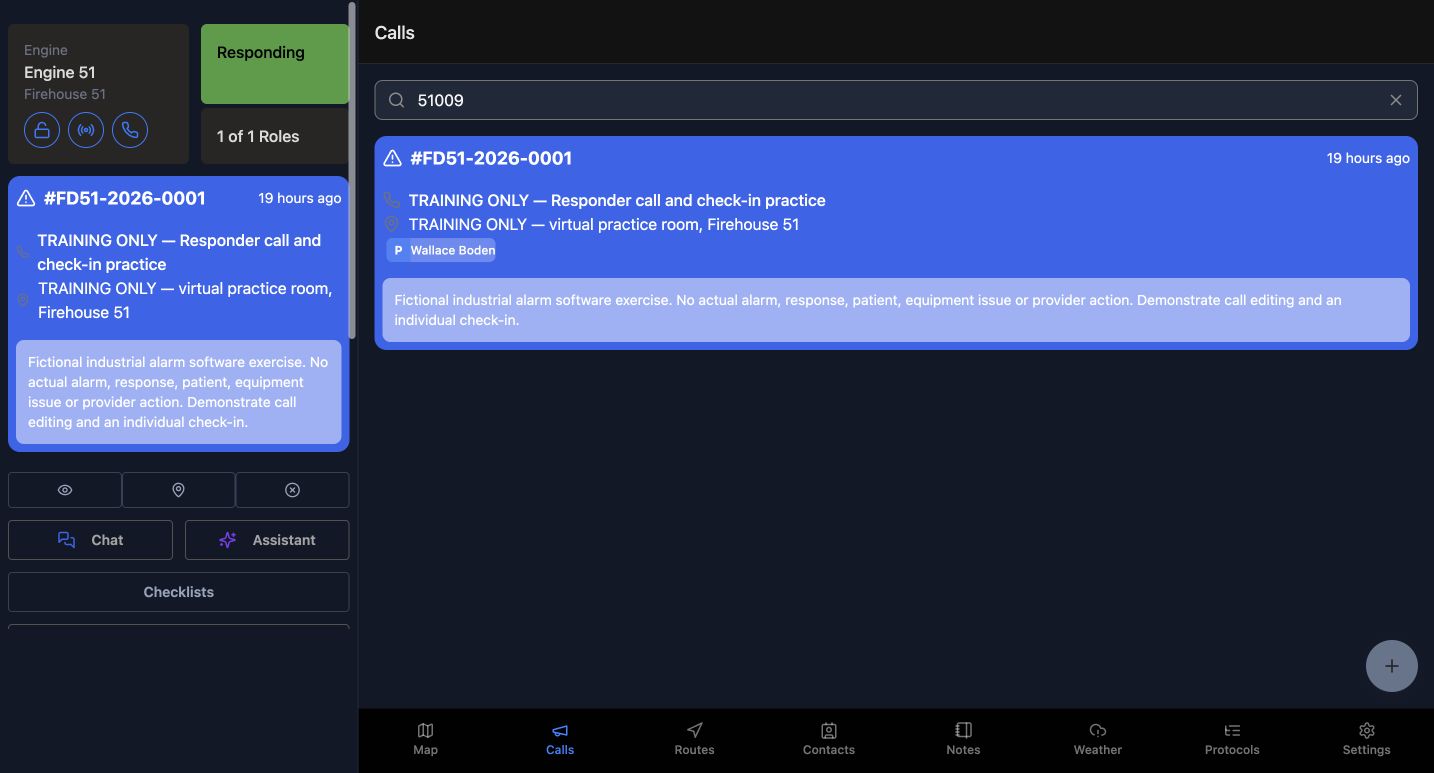
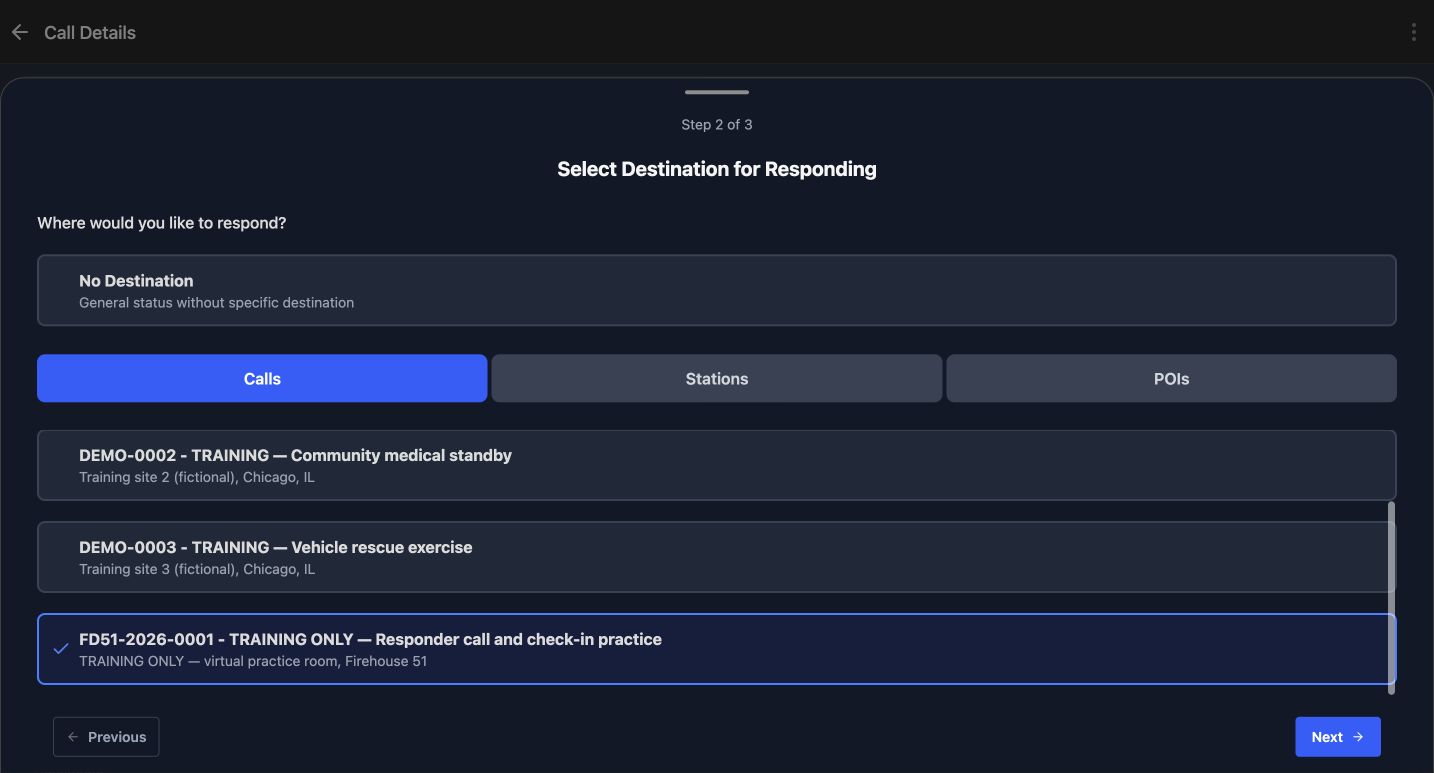
The sidebar shows the active unit’s state. A quick status button opens that status’s destination or note steps; Set Active also opens Select Status. This department uses ordinary Submit. Two-second holding and next-status restrictions depend on configuration. Read the offered destinations and note before submitting, then confirm the saved unit state. Unit status remains separate from the operator’s personal staffing.
Practice
Compare the active apparatus status with a member’s personal availability, then choose a valid training status transition.
Step 9
Understand the sidebar incident context
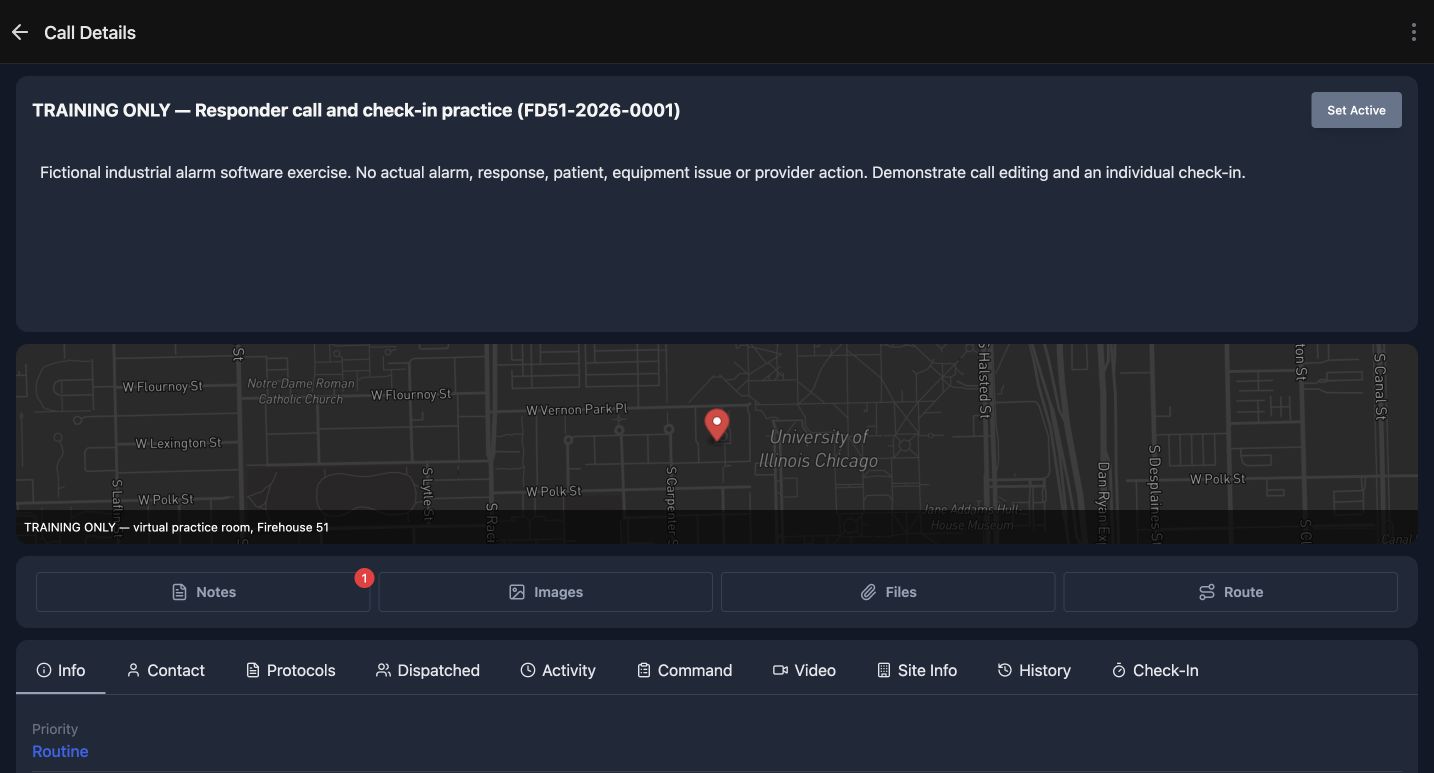
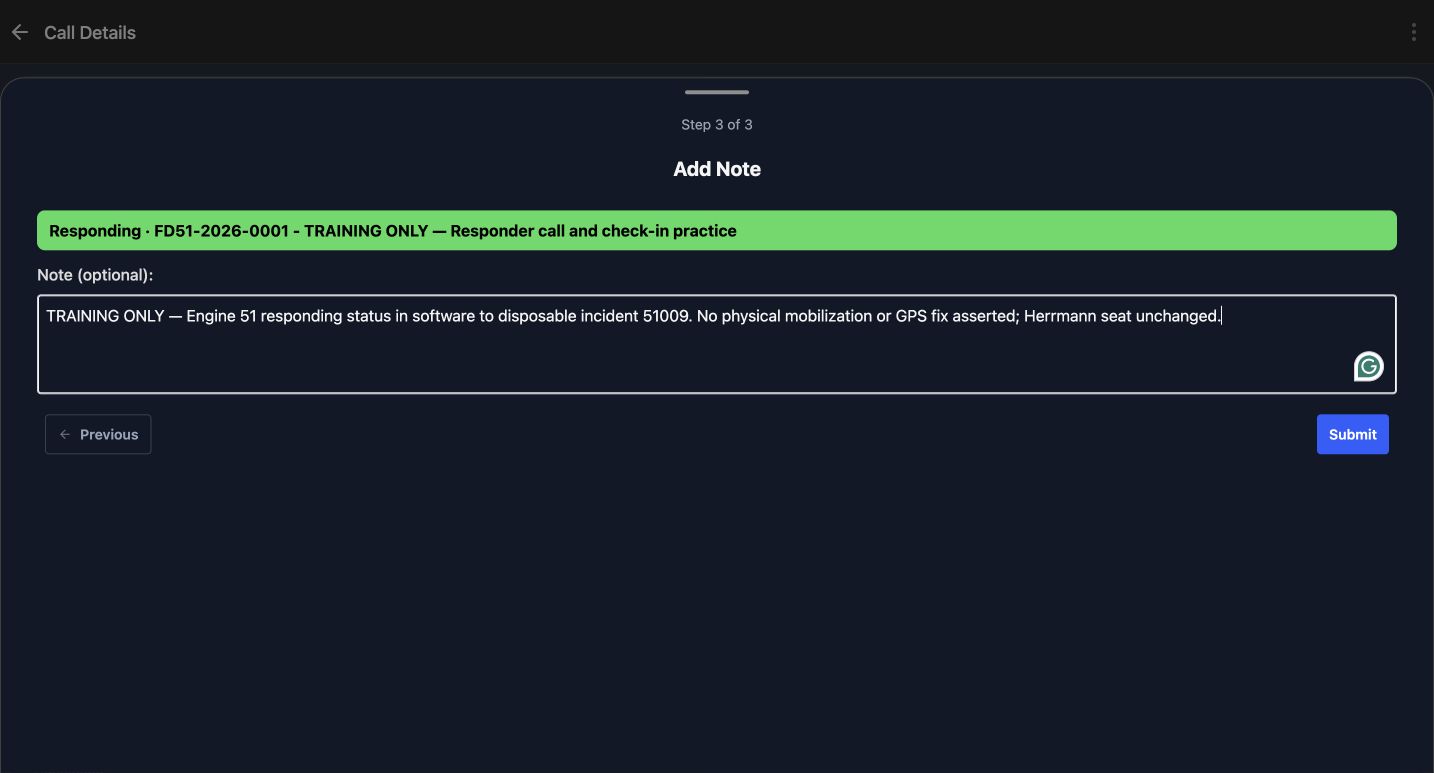
The call card shows the selected incident. View Call Details opens its full screen. Directions offers a mapping handoff, which is unexercised here. Deselect concerns app selection; incident closure is separate. Set Active selected our practice incident and opened Select Status. The unit’s response changed only after the status submission, so verify selection and response separately before describing the crew as dispatched or responding.
Practice
Review a fictional incident’s details and distinguish selecting the incident from changing the unit’s response status.
Step 10
Keep account security and recovery visible
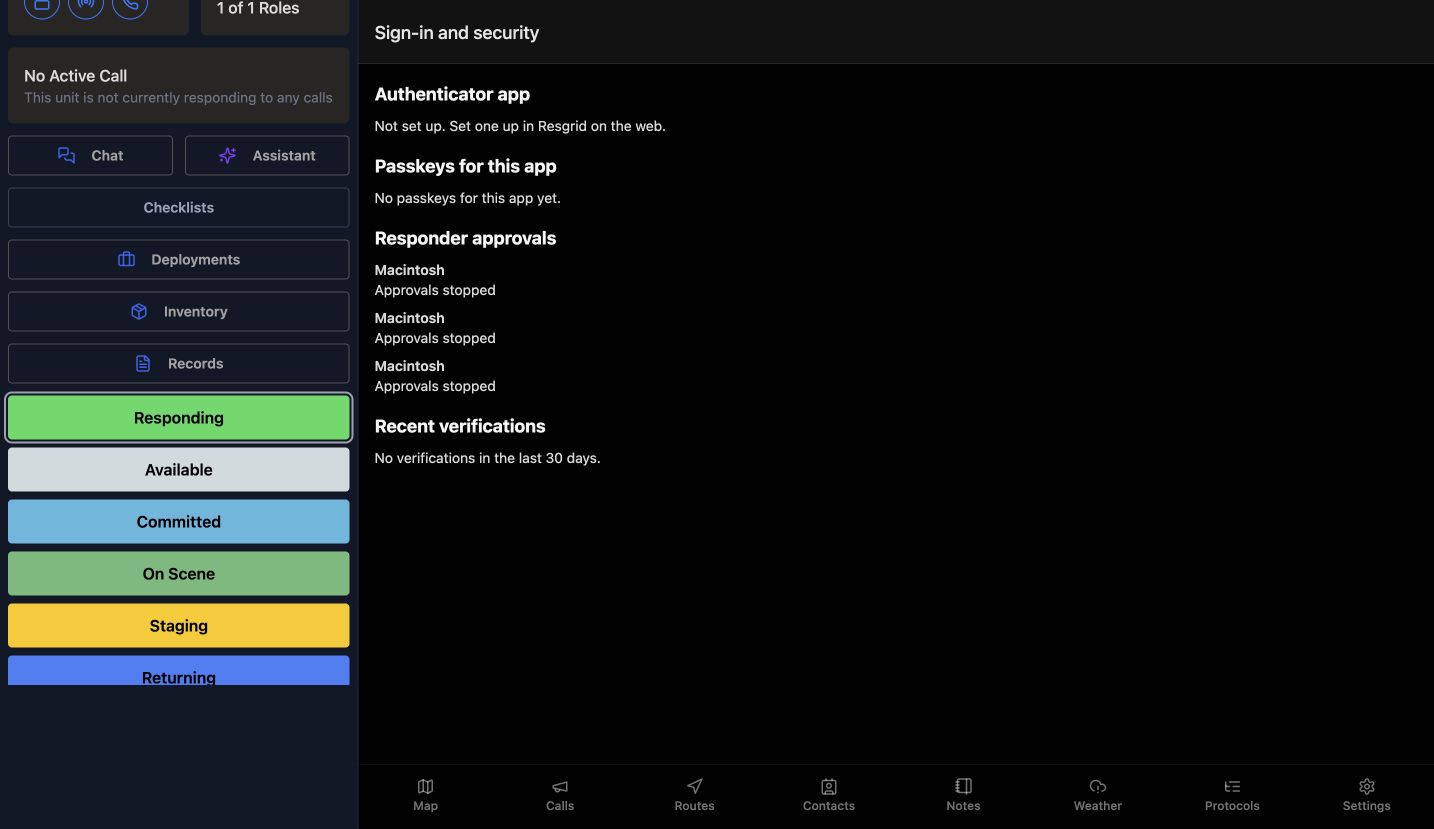
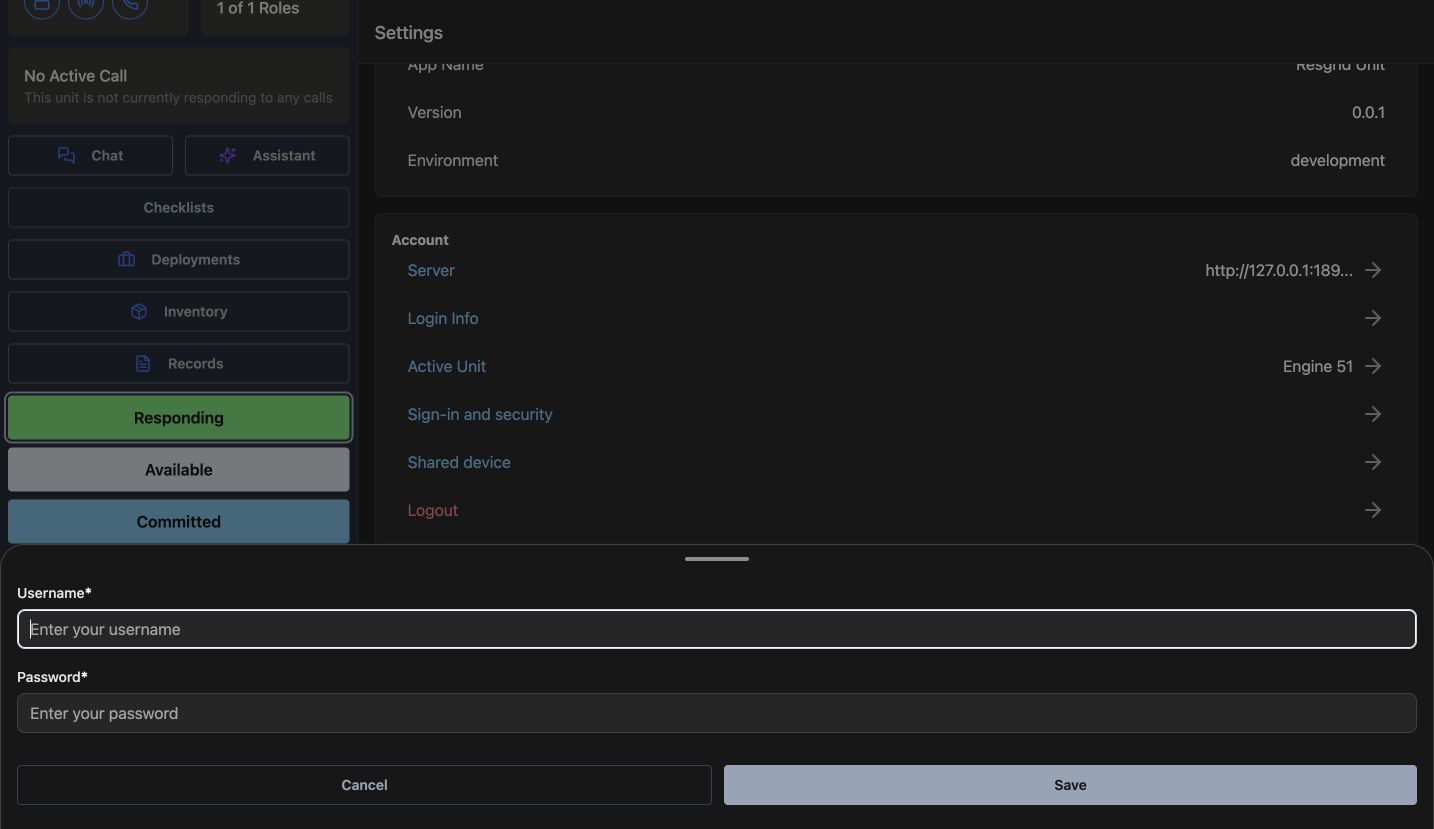
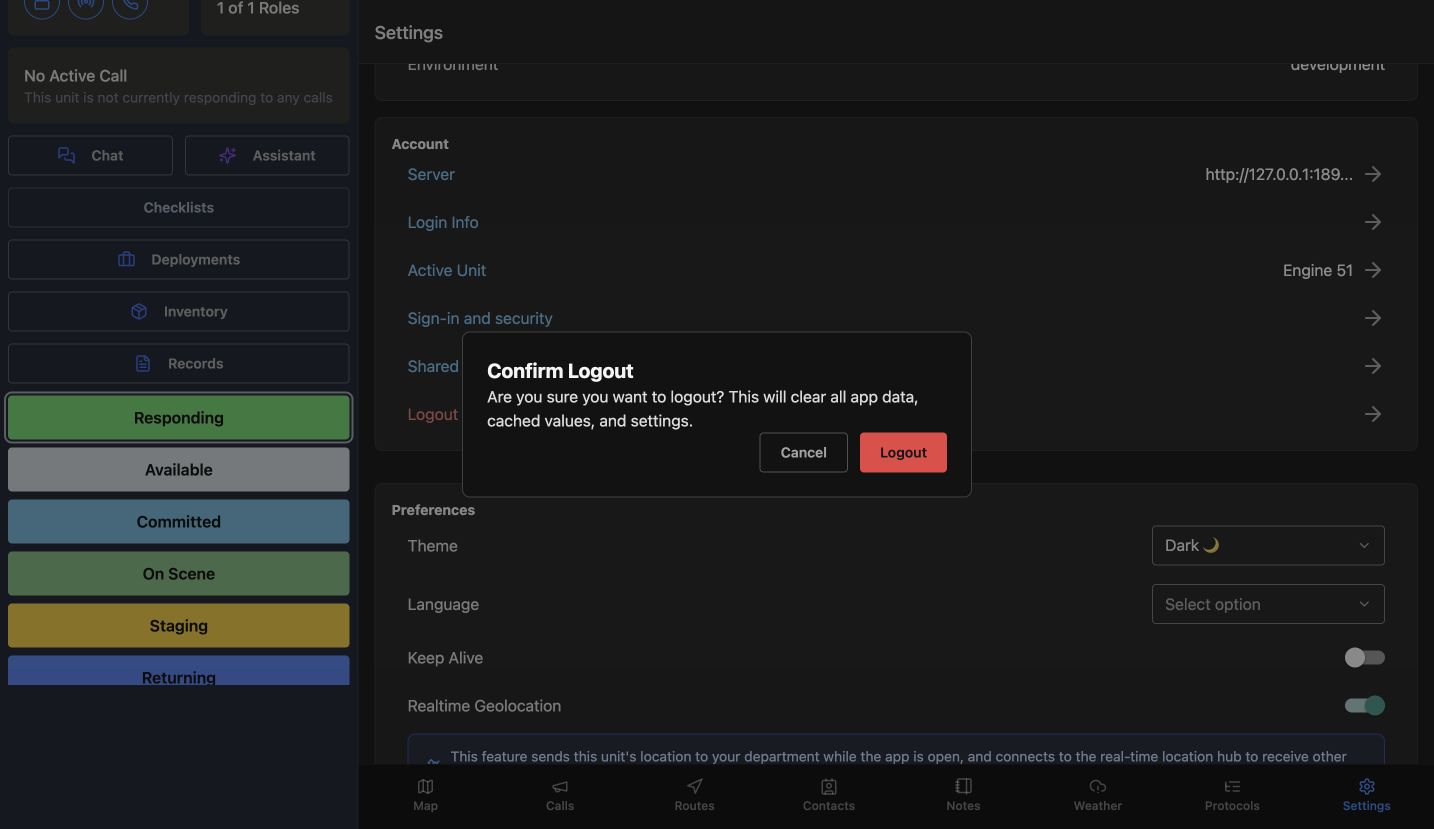
Sign-in and security shows Authenticator app, Passkeys for this app, and Recent verifications. This account says no passkeys are registered for this app. This lesson inspects configuration and recovery prerequisites without enrolling a method, replacing an authenticator, or changing credentials. Login Info opens empty Username and Password fields; Cancel returns without saving. Logout opens Confirm Logout; Cancel preserves the current session.
Practice
Inspect actual account-security state and recovery prerequisites without creating passkeys, changing factors, or exposing credentials.
Examples for your department
- Fire / EMS
- An ambulance crew takes over a mounted tablet.
- Community response
- Volunteers share a community support vehicle across shifts.
- Search and rescue
- A search team uses a shared command vehicle tablet.
- Security
- A patrol team starts a security round.
- Wildland
- A mutual-aid crew changes between a wildland engine and support vehicle.
- Industrial
- An industrial response crew hands over an emergency vehicle.
Transcript
Download transcriptRead the complete transcript
Unit: access, shared devices, and your active crew
Audience: Crews using an apparatus tablet, vehicle device, or shared operational workstation.

Understand the person and the apparatus
Unit follows the apparatus context selected on this device, while a named person signs in. Identify both before working. The active unit scopes status, roles, map context, routes, and inventory; review it in Settings at each handoff. This is useful for a SAR vehicle, community response team, or industrial standby. A vehicle-mounted tablet still needs the correct member and apparatus selection.
Practice: Identify the signed-in training member and the apparatus the tablet is intended to represent before changing any operational data.

Complete first launch and choose the server
Use Next or Skip on the first-launch introduction, then review Language and Server URL on sign-in. Select the correct listed server or the permitted custom address before entering credentials. The introduction describes features but does not prove every device permission is granted. Keep the server choice visible in the demonstration so a crew can recognize a training environment and avoid confusing it with another deployment.
Practice: Confirm the correct server and language before signing in with a training account.

Sign in with an available method
Use Username and Password and select Sign In for this training server. Sign in with SSO is an offered entry, but organization discovery and provider callbacks are unverified here. This lesson uses the ordinary credential flow. Additional verification depends on the methods the server offers; keep credential entry private and check the resulting apparatus context before working.
Practice: Use the training account’s approved sign-in method and identify the verification step actually offered to that account.

Configure a shared installation deliberately
Choose Shared device when several members use the same installation. Turn on This is a shared device and enter Device label (optional), such as the training apparatus identifier, then Save. The setting takes effect at the next sign-in. It identifies the installation; it does not turn a person’s credentials into a shared crew password. Each member still follows the department’s session and verification policy.
Practice: Label a demonstration apparatus tablet and explain why the next user should sign in with their own identity.

Verify the shared-installation sign-in boundary
Shared device identifies the saved installation. A normal reload in this exercise returned to Sign In. Follow the server’s supported sign-in procedure at handoff, verify the member, and recheck Active Unit before work. The label and sign-in boundary are demonstrated; shared-session locking, unlocking, operator switching, and shift ending remain unverified. Those branches require server-supported controls and permitted verification methods.
Practice: Review the saved Shared device label and identify the sign-in and handoff procedure your department supports.

Select the apparatus you actually have
In Settings, open Active Unit and choose the apparatus for this crew. Select Unit lists the units accessible to this member, and Current Unit helps confirm the result. If the expected unit is missing, ask an administrator to check station-group membership. Do not select a different vehicle merely to clear an empty state. The selection scopes several operational screens and should be checked at every handoff.
Practice: Select the demo engine or ambulance, verify Current Unit, and explain the correct response when the intended unit is absent.

Review the actual crew roles
Open the roles card and inspect Unit Role Assignments. Officer / Team Lead already contains Christopher Herrmann. Save is disabled because the roster has not changed. The signed-in operator and assigned crew are separate. Review configured seats before an authorized crew change; role assignments describe apparatus functions, while account permissions and dated shift sign-ups remain separate. This exercise preserves Herrmann’s seat.
Practice: Review a configured crew seat and compare its assigned member with the person using the device. Explain why Save is disabled when the roster has not changed.

Read the unit status before changing it
The sidebar shows the active unit’s state. A quick status button opens that status’s destination or note steps; Set Active also opens Select Status. This department uses ordinary Submit. Two-second holding and next-status restrictions depend on configuration. Read the offered destinations and note before submitting, then confirm the saved unit state. Unit status remains separate from the operator’s personal staffing.
Practice: Compare the active apparatus status with a member’s personal availability, then choose a valid training status transition.

Understand the sidebar incident context
The call card shows the selected incident. View Call Details opens its full screen. Directions offers a mapping handoff, which is unexercised here. Deselect concerns app selection; incident closure is separate. Set Active selected our practice incident and opened Select Status. The unit’s response changed only after the status submission, so verify selection and response separately before describing the crew as dispatched or responding.
Practice: Review a fictional incident’s details and distinguish selecting the incident from changing the unit’s response status.

Keep account security and recovery visible
Sign-in and security shows Authenticator app, Passkeys for this app, and Recent verifications. This account says no passkeys are registered for this app. This lesson inspects configuration and recovery prerequisites without enrolling a method, replacing an authenticator, or changing credentials. Login Info opens empty Username and Password fields; Cancel returns without saving. Logout opens Confirm Logout; Cancel preserves the current session.
Practice: Inspect actual account-security state and recovery prerequisites without creating passkeys, changing factors, or exposing credentials.

Examples for your department
Fire / EMS: An ambulance crew takes over a mounted tablet.
Community response: Volunteers share a community support vehicle across shifts.
Search and rescue: A search team uses a shared command vehicle tablet.
Security: A patrol team starts a security round.
Wildland: A mutual-aid crew changes between a wildland engine and support vehicle.
Industrial: An industrial response crew hands over an emergency vehicle.